Purchase
The Purchase module allows you to manage purchase agreements, vendor quotations, and purchase orders with ease.Track purchase, automate stock replenishment, and monitor your order follow-ups efficiently.
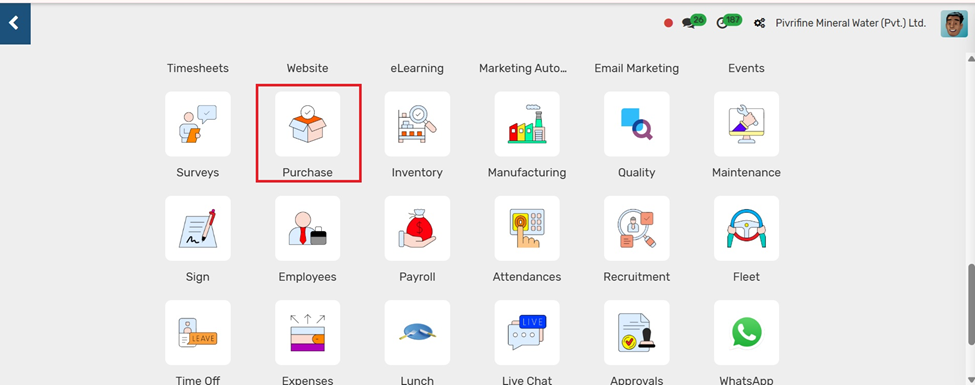
Home Screen → Click on Purchase Module.
The Configuration section allows you to set up your purchase process according to your business needs.
Configuration
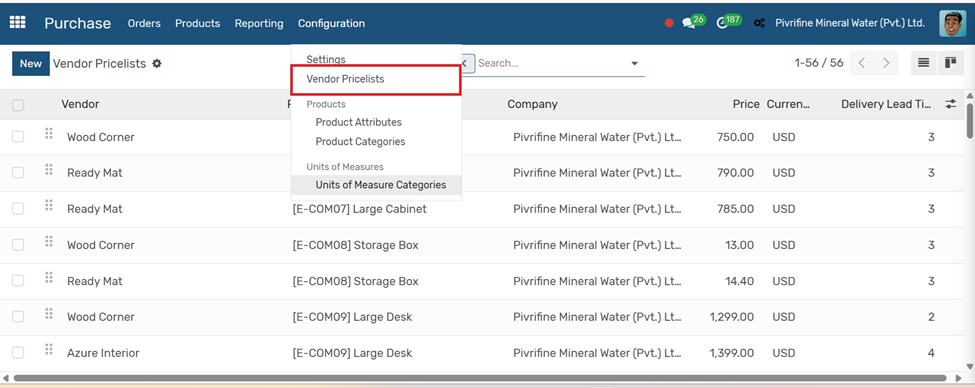
Go to Purchase → Configuration.
Here you can set up core components such as:
These configurations help control how purchases are managed and processed in your system.
- Products and Categories
- Vendor Pricelists
- Units of Measure
- Product Attributes
- Procurement Methods
Click on any option and use the Create button to add new records.
These configurations help control how purchases are managed and processed in your system.
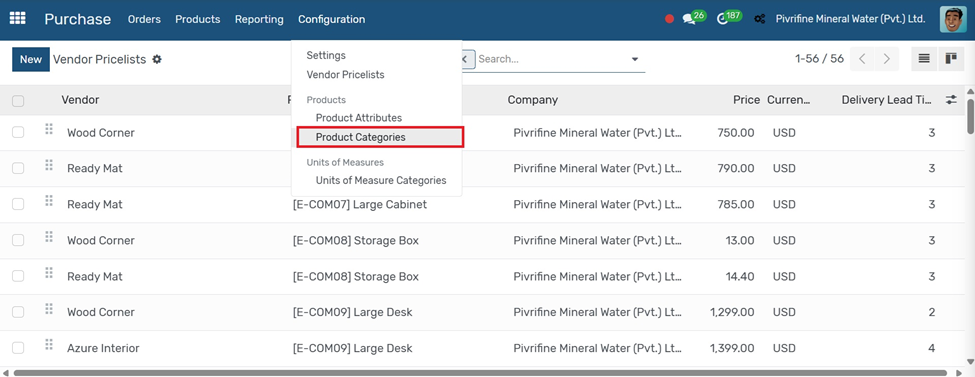
Vendor Pricelists
Go to Purchase → Configuration → Vendor Pricelists.
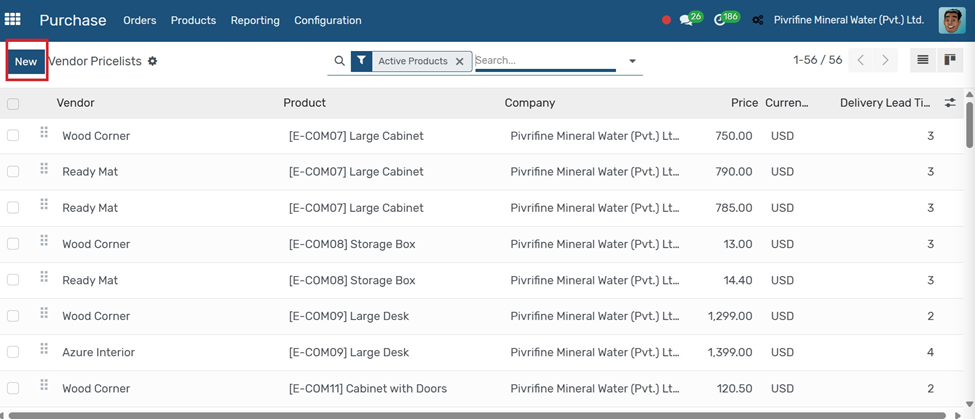
- Click the Create button.
- Select the Vendor and enter the Product, Price, Quantity, and Validity Date.
- Add multiple lines if needed for different products or quantity-based pricing.
- Click Save to apply the price list.
In vendor pricelist create on New
Vendor: Select the supplier from whom you're purchasing.
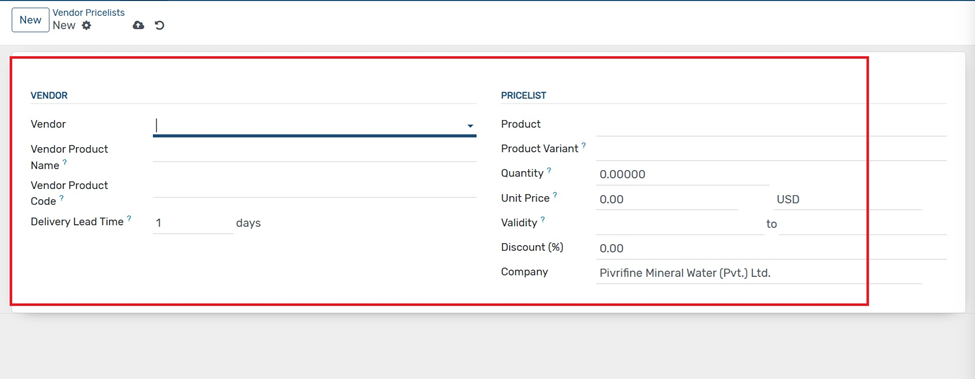
- Product: Choose the product this price is for.
- Vendor Product Name: (Optional) The product name used by the vendor.
- Vendor Product Code: (Optional) The code or SKU used by the vendor.
- Currency: The currency used for this price.
- Price: The cost per unit you pay the vendor.
- Quantity: The minimum quantity to apply this price.
- Delivery Lead Time: Days the vendor takes to deliver after order confirmation.
- Validity Dates (optional): From/To dates during which this pricelist is valid.
- Company: Select if this applies to a specific company (multi-company setups).
Click Save to create the pricelist entry.
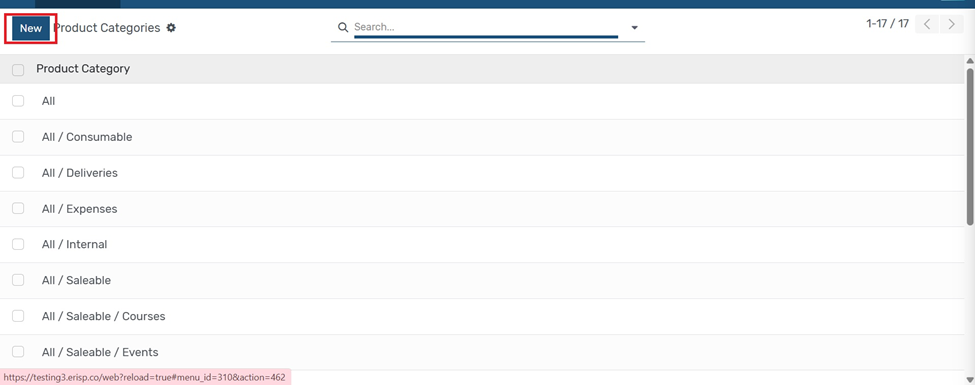
Product Category
To add a new product category
Go to Purchase → Configuration → Product → Product Categories.
- Click the Create button.
- Enter the Category Name (e.g., Raw Materials, Office Supplies).
- Set Parent Category if it's a sub-category.
- Define accounting, inventory, and valuation settings if needed.
- Click Save to create the category.
In Product Categories Create on New
so there will be display
- Category Name: Enter a name (e.g., Raw Materials, Office Supplies, Electronics).
- Parent Category (optional): Select a parent to create a hierarchy (e.g., Electronics → Mobile Phones).
- Routes (optional): Enable specific inventory routes (Buy, Manufacture, Dropship, etc.).
- Force Removal Strategy (optional): Choose how stock is picked (FIFO, LIFO, Closest Location).
- Logistics / Accounting Settings (Advanced use):
- Inventory Valuation: Manual or automated
- Costing Method: Standard, FIFO, or Average Cost
- Accounts: Configure stock input/output/valuation accounts if integrated with accounting.
- Click Save
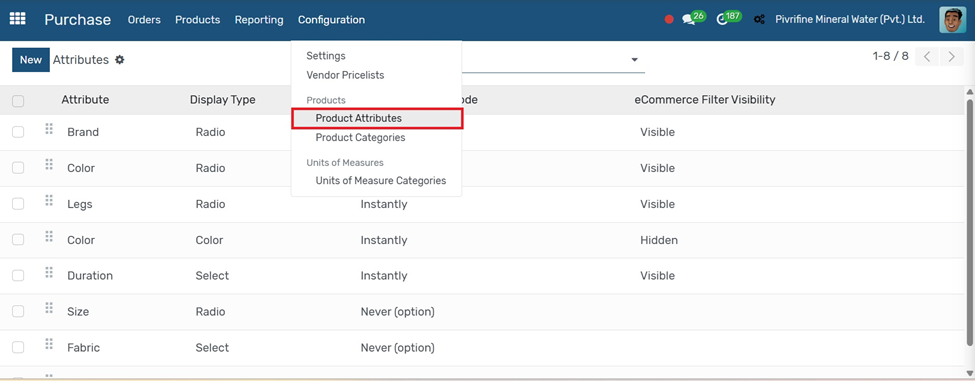
Product Attribute
Go to Purchase → Configuration → Product → Attributes.
- Click the Create button.
- Enter the Attribute Name (e.g., Color, Size, Material).
- Add Attribute Values (e.g., Red, Blue for Color).
- Choose the Display Type (Radio, Dropdown, etc.).
- Click Save to create the attribute
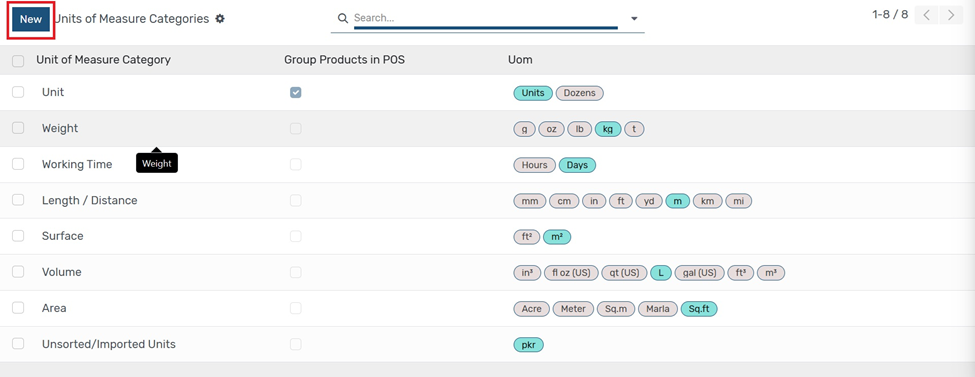
Unit of Measure Category
Go to Purchase → Configuration → Unit of Measure → Units of Measure.
- Click the Create button.
- Enter the Unit Name (e.g., Box, Dozen, Kg).
- Select the Category (e.g., Weight, Length).
- Set the Type (Reference, Bigger than the reference, Smaller than the reference).
- Define conversion ratios if needed.
- Click Save to create the unit.
In unit of measures inside unit of measures categories
Once the UoM category is created, you can define actual units under this category
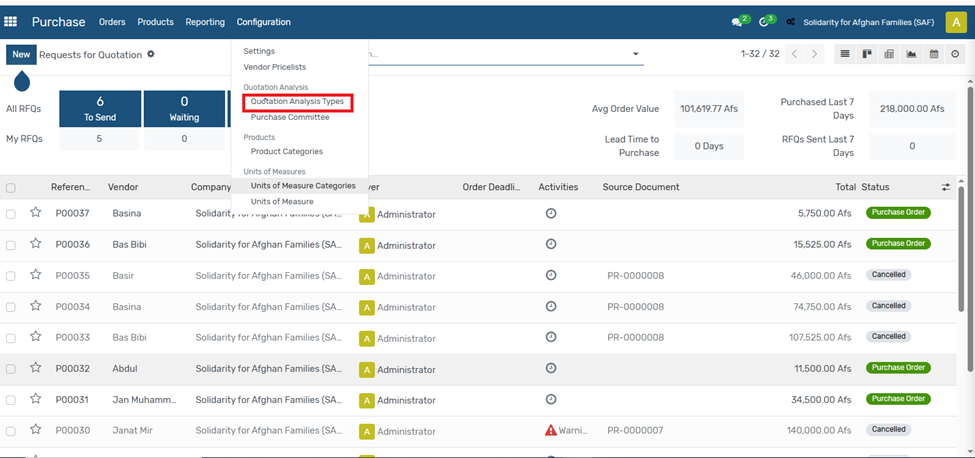
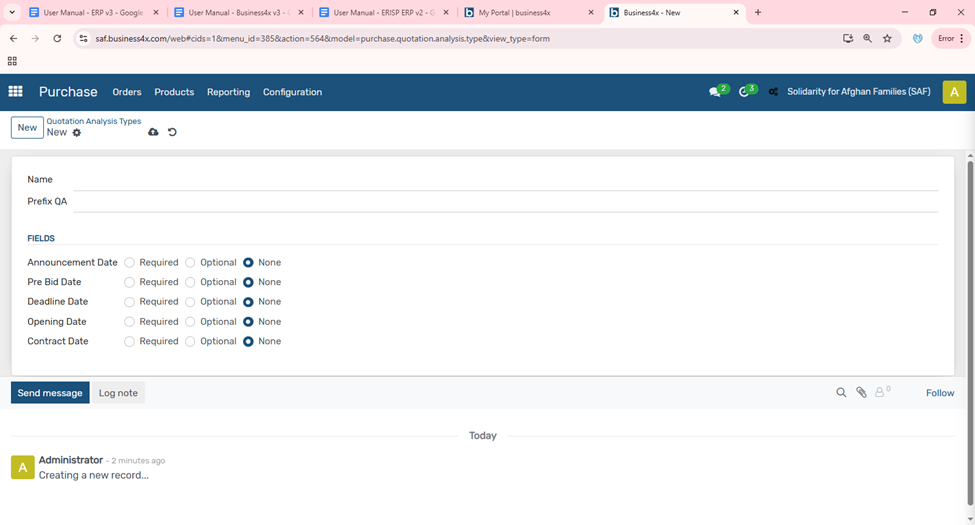
Quotation Analysis Types
Go to Purchase → Configuration → Quotation Analysis Types
Name a unique name for the Quotation Analysis Type
Prefix QA A short prefix automatically added to each generated Quotation Analysis reference
Fields:
- Announcement Date is the date when the quotation or tender is officially shared with vendors.
- Pre Bid Date refers to the date when vendors are invited to a pre-bid meeting, often used for clarifying doubts.
- Deadline Date is the final submission date for receiving vendor quotations.
- Opening Date indicates when the received quotations will be opened and reviewed.
- Contract Date is the date on which the final contract is signed with the selected vendor

In unit of measures inside unite of measures categories

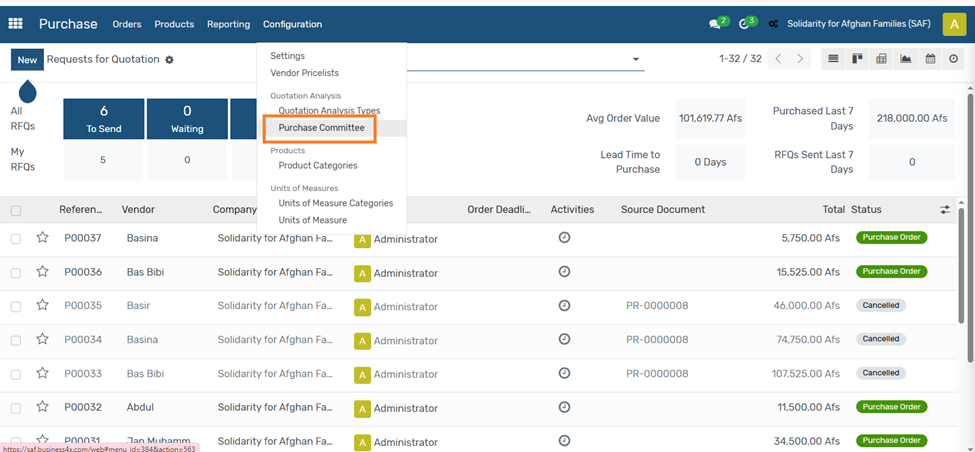
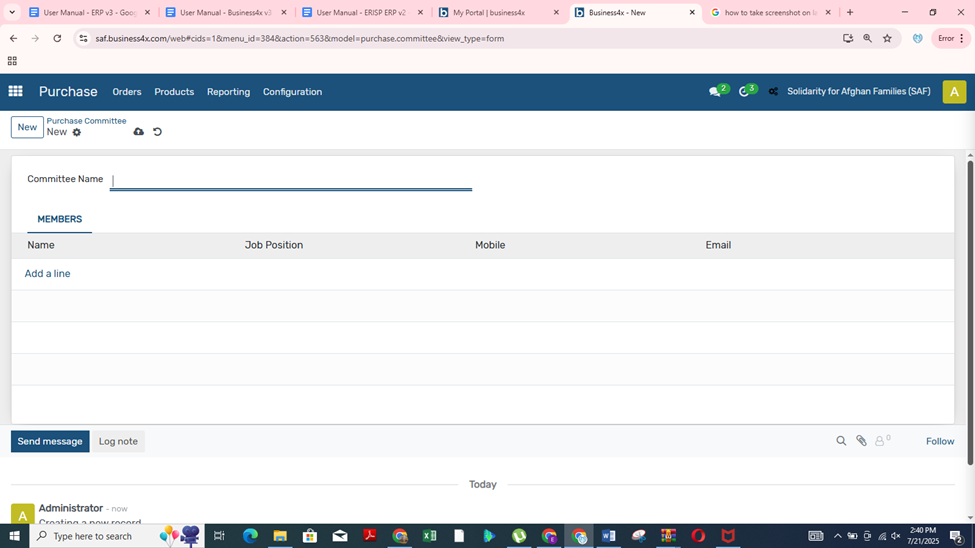
Purchase Committee
Go to Purchase → Configuration → Purchase Committee
- Committee Name
This is the name or title of the purchase committee (e.g., "Procurement Review Board"). It helps identify the group responsible for evaluating and approving purchases. - Members
This section allows you to add individuals who are part of the committee. Each row includes the following fields: - Name: Select the name of the employee or user who is a member of the committee.
- Job Position: This shows the official role or job title of the member (e.g., Procurement Officer, Finance Manager).
- Mobile: Contact number of the committee member.
- Email: Email address of the committee member for communication purposes.
Use the “Add a line” button to include multiple members in one committee.
Once the UoM category is created, you can define actual units under this category
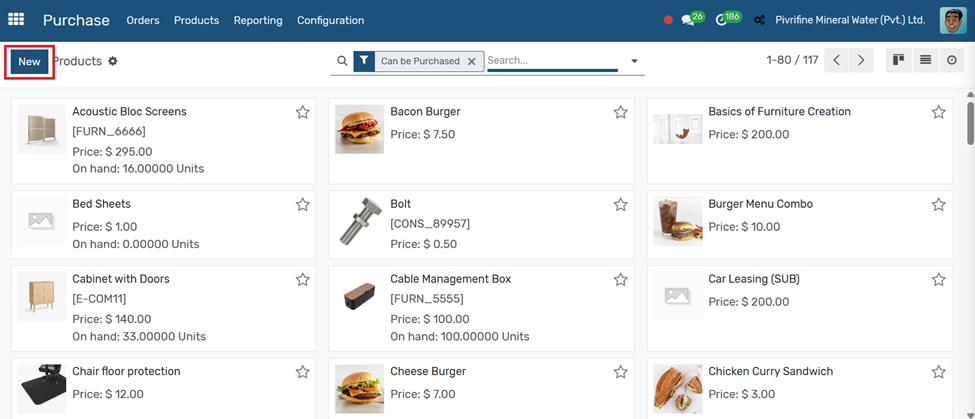
Purchase
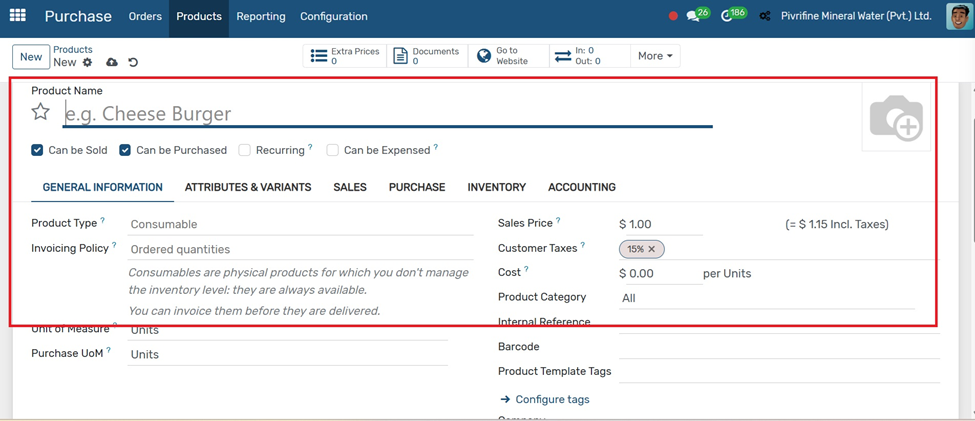
Go to Purchase → Products → Products, and click the Create button.
- Product Name Enter the item name.
- Product Type – Select:
- Storable Product – if tracked in stock.
- Consumable – no stock tracking.
- Service – for non-material items.
- Product Category – Assign a relevant category
- Purchase UoM – Choose the purchase unit (e.g., kg, box).
- Internal Reference – Optional product code
- Vendors – Add one or more suppliers:
- Vendor Name
- Price
- Currency
- Variants – Add attributes for size, color, etc.
In the purchase product, click on new
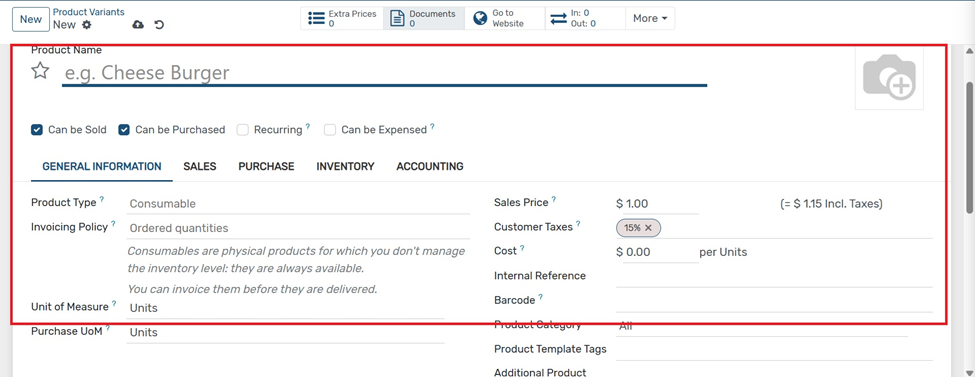
Product Variants are different versions of a product based on attributes like size, color, or material
Product Variants
Go to Purchase → Products → Products Variants
- Click the Create button or open an existing product.
- Under the Variants tab, click Add an item.
- Select or create Attributes (e.g., Size, Color).
- Add multiple Attribute Values (e.g., Small, Medium, Large).
- Odoo will automatically generate product variants based on combinations.
- Click Save to apply the changes.

In Purchase product+product Variants
Orders
RFQ
Go to Purchase → Orders → Requests for Quotation.
- Click the Create button.
- Select the Vendor from whom you want to request a quote.
- Add the Product(s), Quantity, and Planned Date.
- Enter pricing or leave it blank for the vendor to fill.
- Click Save, then click Send by Email to send the RFQ.
- Once the vendor responds, click Confirm Order to convert it into a Purchase Order.
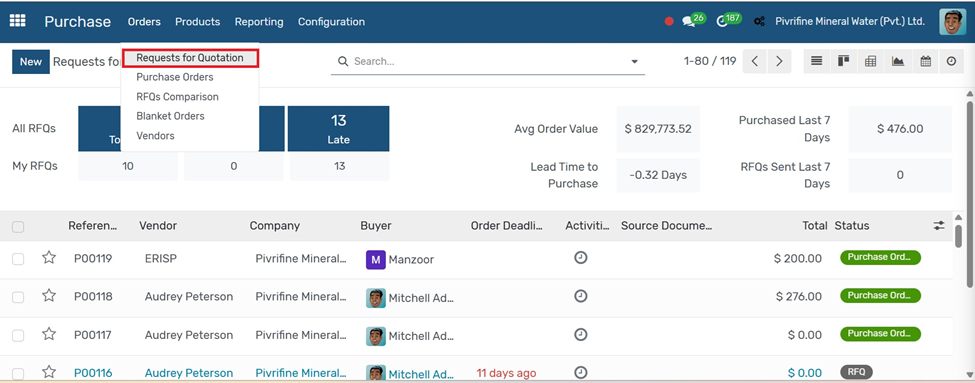
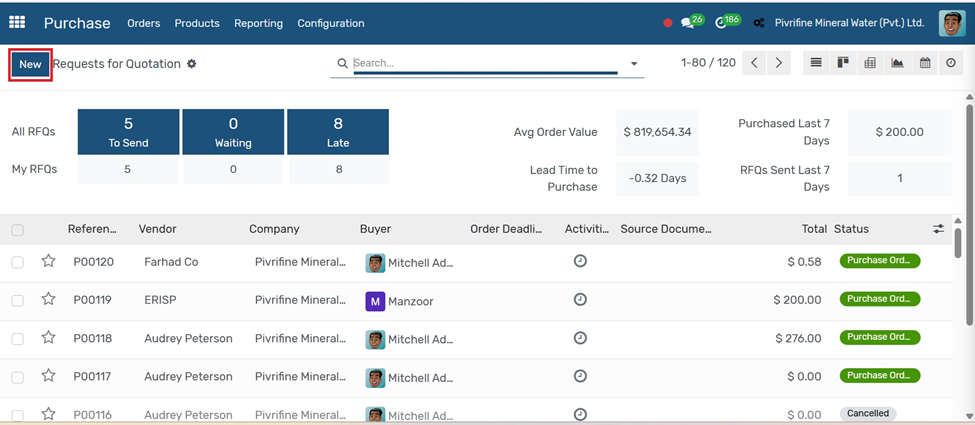
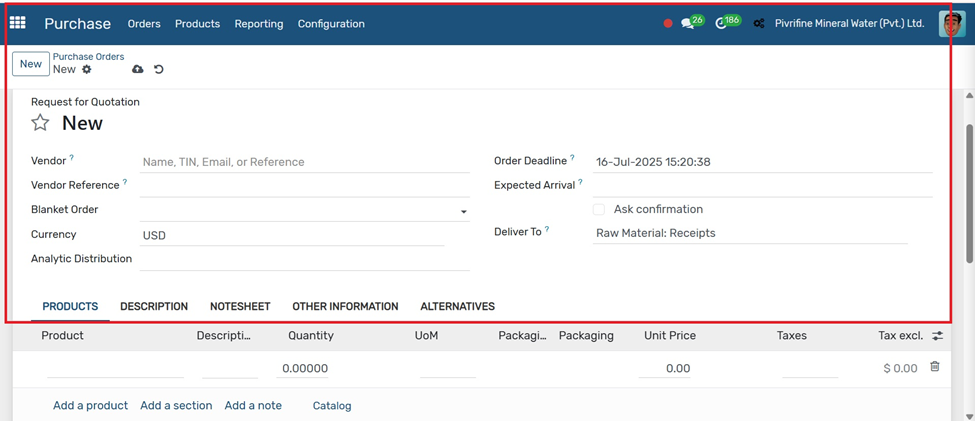
In request for Quotation click on new
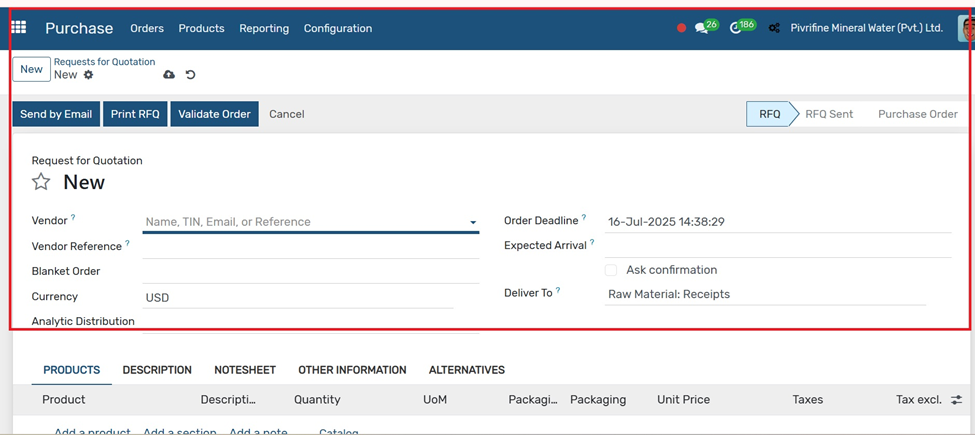
- Vendor: Select the supplier you’re requesting the quote from.
- Order Deadline (optional): The last date to confirm this RFQ.
- Receipt Date: Planned date for receiving the products.
- Currency: Automatically selected based on vendor; change if needed.
- Product Lines:
- Click Add a Product.
- Fill in Product, Description, Quantity, UoM, and Unit Price (optional — vendor may fill in).
- Taxes: Automatically applied based on product and vendor settings.
- Terms & Conditions (optional): Add any notes for the supplier.
- Click Save.
- Click Send by Email to email the RFQ to the vendor.
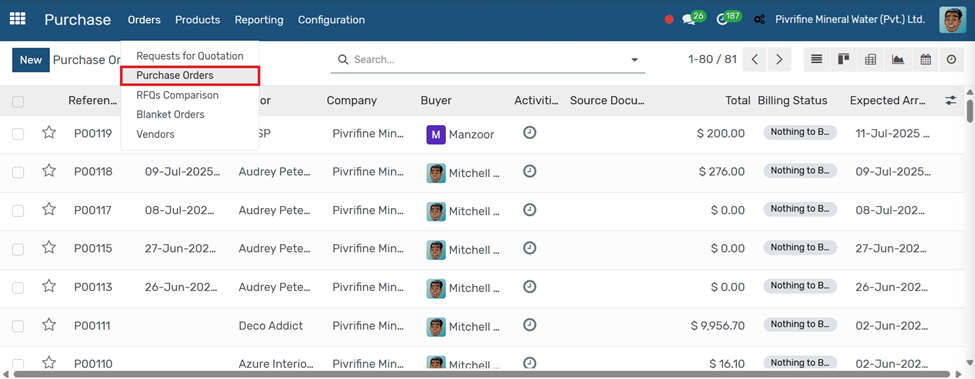
In Purchase → Orders → Purchase Orders menu, to create a New Purchase Order go to Purchase Orders and click on the Create button.
Purchase Order
Go to Purchase → Orders → Purchase Orders.
- Click the Create button.
- Select the Vendor.
- Add the Product(s), Quantity, Unit Price, and Planned Date.
- Review taxes, terms, and other details.
- Click Confirm Order to validate the purchase.
- This will trigger delivery and billing processes based on your settings
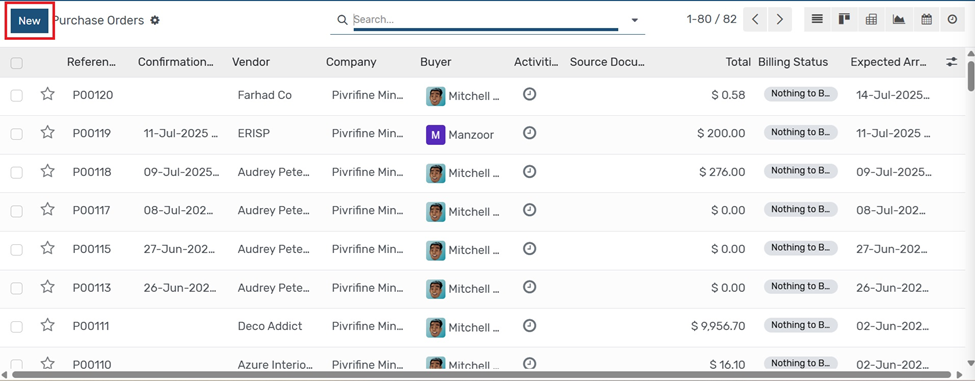
In purchase order click on NEW
- Vendor: Select the supplier you’re ordering from.
- Vendor Reference (Optional): Their order number or invoice reference.
- Order Deadline: The last date to confirm the order.
- Receipt Date: Expected delivery date.
- Product Lines Section:
Click Add a Product, then fill:
- Product: Select the item.
- Description: Auto-filled or editable.
- Quantity: How many units to order.
- UoM: Unit of Measure (e.g., Units, Kg).
- Unit Price: Cost per item.
- Taxes: Automatically applied based on vendor/product.
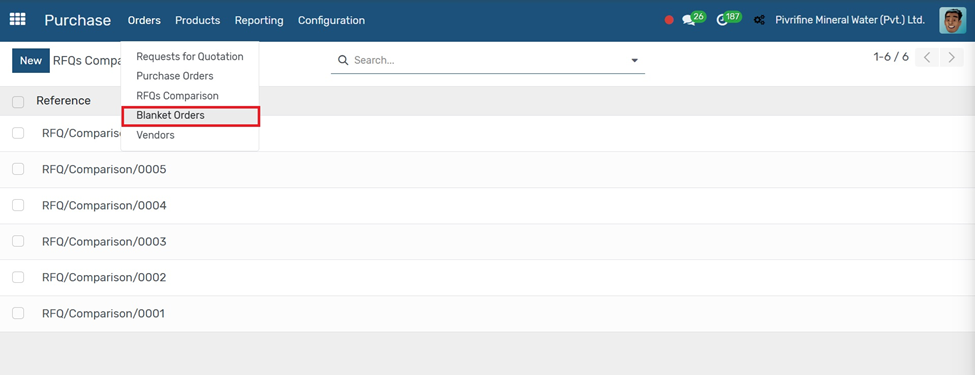
Blanket Orders
Go to Purchase → Orders → Blanket Orders.
- Click the Create button.
- Select the Vendor you want to make the agreement with.
- Add the Product(s), total Quantity, and Agreed Price.
- Set the Validity Period and Delivery Terms.
- Save and Confirm the blanket order.
- You can now create multiple purchase orders from this agreement over time.

In Blank orders click on NEW
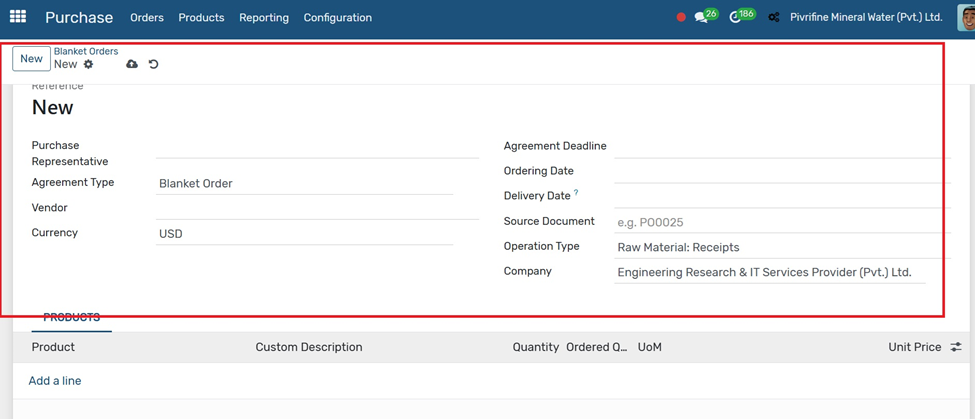
Fill in the key details:
- Agreement Type: Select Blanket Order
- Vendor: Choose supplier
- Currency: Auto-filled or set manually
- Agreement Deadline & Dates: Set time limits
- Operation Type: Select operation type like Raw Material: Receipts
- Add Products: Click Add a line to enter products and quantity
Use this to create long-term purchase agreements with vendors.
To add a new vendor, go to Purchase → Configuration → Vendors and click the Create button.
Vendors
Go to Purchase → Configuration → Vendors.
- Click the Create button.
- Enter the Vendor Name and Contact Information.
- Under the Purchase tab, set payment terms, pricelist, and delivery methods.
- Add bank details, tax ID, or other relevant info if needed.
- Click Save to add the vendor to your database.
Products
Go to Purchase → Products → Products and click the Create button.
- Product Name: Enter the item name.
- Product Type – Select:
- Storable Product – if tracked in stock.
- Consumable – no stock tracking.
- Service – for non-material items.
- Product Category – Assign a relevant category
- Purchase UoM – Choose the purchase unit (e.g., kg, box).
- Internal Reference – Optional product code
- Vendors – Add one or more suppliers:
- Vendor Name
- Price
- Currency
- Variants – Add attributes for size, color, etc.
In purchase product click on new
Product Variants are different versions of a product based on attributes like size, color, or material.
Product Variants
Go to Purchase → Products → Products Variants
- Click the Create button or open an existing product.
- Under the Variants tab, click Add an item.
- Select or create Attributes (e.g., Size, Color).
- Add multiple Attribute Values (e.g., Small, Medium, Large).
- Odoo will automatically generate product variants based on combinations.
- Click Save to apply the changes
In Purchase product + product Variants
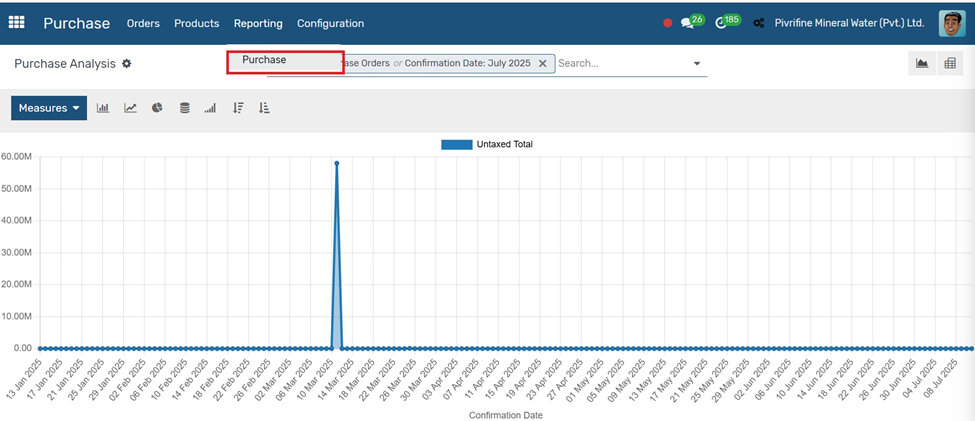
Reporting
The Reporting section in the Purchase module provides insights into your procurement performance.
Go to Purchase → Reporting → Purchase Analysis.
- Use the Filters, Group By, and Measures options to customize your report.
- Analyze data like:
- Total purchases by vendor or product
- Purchase order status
- Average delivery delays
Switch between graph, pivot, and list views as needed.
Export or print reports for further use.
Previous Requisition Next Inventory